> For the complete documentation index, see [llms.txt](https://docs.relevant-digital.com/llms.txt). Markdown versions of documentation pages are available by appending `.md` to page URLs; this page is available as [Markdown](https://docs.relevant-digital.com/ad-revenue-insights/mapping/advanced-mapping-tool.md).
# Advanced Mapping Tool
Review missing SSP traffic, match new placements, and import updated mappings into Yield with the advanced mapping tool.
Advanced mapping allows you to review and adjust mappings for new placements to ensure data is accurately reflected in your reports.
It is recommended to use this functionality periodically (for example, once a week). It will pick up recently added placements in your ad server and SSP accounts, ensuring the data is included in your reports.
The import is not performed automatically because inconsistencies in placement naming could result in incorrect mapping. For this reason, the advanced import includes a step where you can review and adjust the mapping before the import is completed.
{% stepper %}
{% step %}
### Check missing SSP traffic
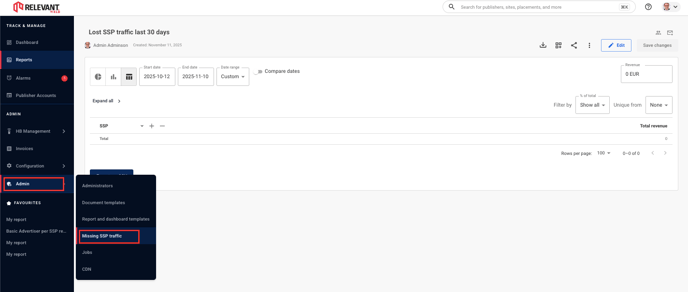
Open **Admin** > **Missing SSP Traffic** to see whether data is currently missing from standard Yield reports.
If the report shows substantial data, continue with the bulk import.
{% endstep %}
{% step %}
### Open Advanced Mapping
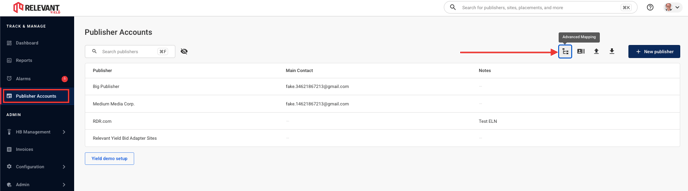
Go to **Publisher Accounts** and click the  **Advanced Mapping** button.
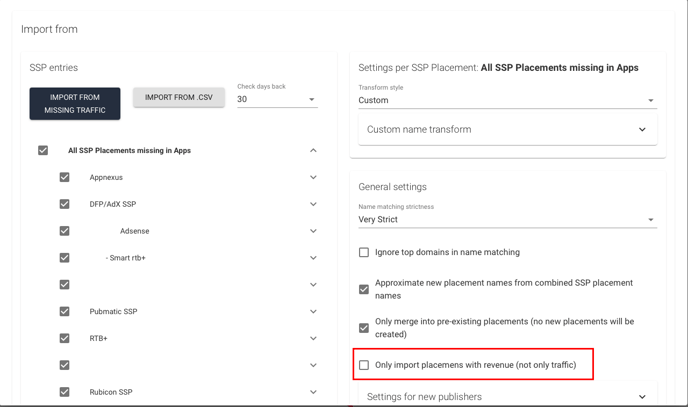
The dialog looks like this:
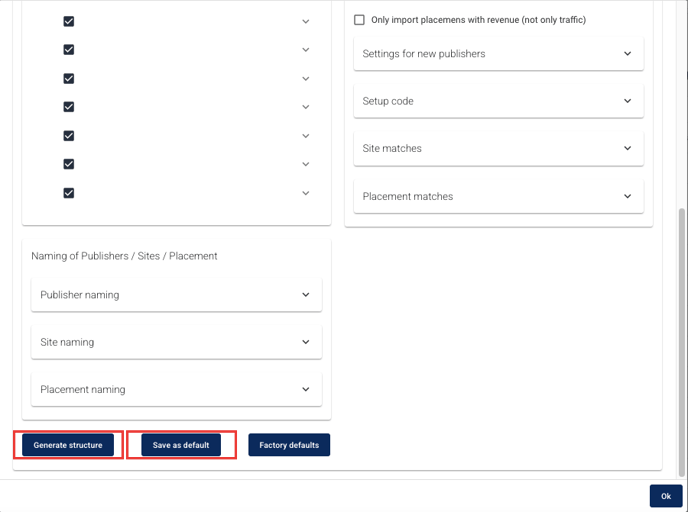
You usually do not need to change the settings. If you see a lot of traffic without revenue on the **Missing SSP Traffic** page, consider enabling **Only import placements with revenue (not only traffic)**. Click **Save as default** to keep that setting.
{% endstep %}
{% step %}
### Generate the structure
Click **Generate structure**. This does not update the system. It only shows which SSP placements will be added and where they will go when you later click **Perform import**.
Grey text shows existing publishers, sites, and placements. Black text shows new ones. Enable **Show all existing** if you want to view the full structure, including areas where nothing will be added.
{% endstep %}
{% step %}
### Review and adjust matches
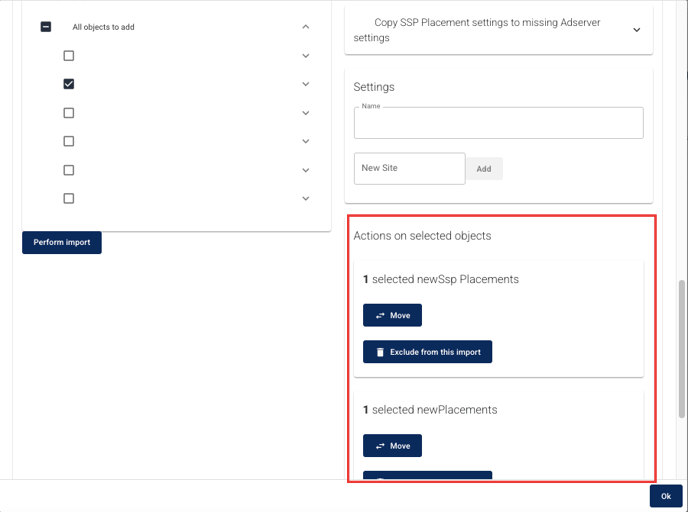
Check the placements listed under **Failed Matches** on the right. These are placements where the import could not determine the correct Publisher, Site, or Placement. Add these manually later through the Publisher pages.
If an SSP placement appears in the wrong location, select it and click the first **Move** button. If you do not want to import a placement yet, click **Exclude from this import**.
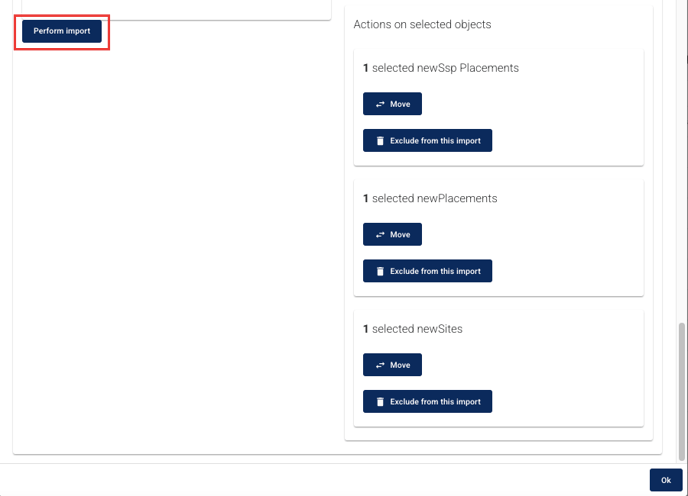
The other **Move** and **Exclude** buttons work the same way for selected new placements or sites.
After clicking **Ok**, review the updated tree.
{% endstep %}
{% step %}
### Perform the import
When everything looks correct, click **Perform import** to apply the update.
{% hint style="warning" %}
All placements shown in the tree view on the left will be imported, unless **Show all existing** has been selected, in which case everything will be displayed. The checkboxes are only used for the Move/Exclude functionality and do not indicate whether placements will be imported.
{% endhint %}
{% endstep %}
{% endstepper %}
In conclusion, it is recommended to perform an import every one to two weeks to avoid "losing" too much traffic in the reports. Most of the time, however, the procedure simply involves pressing the Generate and Perform import buttons.
---
# Agent Instructions
This documentation is published with GitBook. GitBook is the documentation platform designed so that both humans and AI agents can read, navigate, and reason over technical content effectively. Learn more at gitbook.com.
## Querying This Documentation
If you need additional information that is not directly available in this page, you can query the documentation dynamically by asking a question.
Perform an HTTP GET request on the current page URL with the `ask` query parameter, and the optional `goal` query parameter:
```
GET https://docs.relevant-digital.com/ad-revenue-insights/mapping/advanced-mapping-tool.md?ask=&goal=
```
`ask` is the immediate question: it should be specific, self-contained, and written in natural language.
`goal` is optional and describes the broader end goal you are ultimately trying to accomplish on behalf of the user. GitBook uses it to tailor the answer towards what is most useful for that goal.
The response will contain a direct answer to the question and relevant excerpts and sources from the documentation.
Use this mechanism when the answer is not explicitly present in the current page, you need clarification or additional context, or you want to retrieve related documentation sections.